Welcome to our first ever Tutorial Tuesday!!!
Good morning my name is Tricia Whelan from Treasure Lee Boutique and I am here to bring you our first Tutorial Tuesday. Upcycling has been taking the internet by storm in the past little while, so today we are going to join the wave. :) You need to have a dress pattern in order to do this, but most dress patterns don't come with instructions on how to section it off to upcycle a shirt that is too small. So, for this tutorial, I have used the Olivia by Farbenmix. This is the dress I ended up with.
This is the portion of the original shirt I wanted. I think it was about a 12mos, and I want a size 4 dress.
Line down the middle to help me keep centered.
So, I sat it on the pattern and checked to see all that I had to fill in. I have a line down the middle of the panel, so that I can keep it centered. Whatever I do on one side I have to do on the other.
Here it is with pieces large enough to extend over the pattern. Not going for precision, I will just piece together for now and then cut to size later.
I serge and then top stitch all my seams as I go. I didn't take a pic everytime, but it makes things look much more professional.
So, since I want to use 2 more fabrics for the bottom, I measured the center line from the panel to the bottom of the skirt. Divided that in half to find the length that I needed. Measured from the center line to the outer edge x 2 for the width. Then pinned and stitched making sure the centers lined up so that there would be enough fabric on each side. Don't forget to serge and topstitch after every seam.
Above the center panel I measured how much I would need to reach the shoulder seam. Cut an appropriate piece then sewed, serged and topstitched to center panel.
Now fold your large pieced fabric down the center line, taking care to make sure that your seams line up on the horizontal. Place your pattern piece on top and cut.
Now fold your large pieced fabric down the center line, taking care to make sure that your seams line up on the horizontal. Place your pattern piece on top and cut.
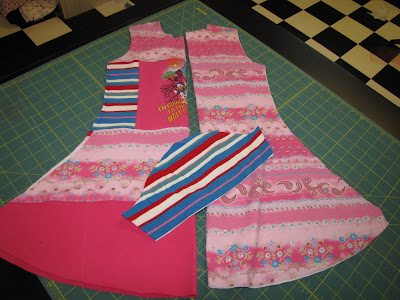
Here is the front, back and sleeves all ready to be sewn together.
Follow the pattern for final assembly and there you have it.


.jpg)


